About Me

My photo
Hello! This is a blog documenting works in progress produced by me in DSDN 144. As the blog title explains it all, I'm a photography newbie. Always had strong interests in photography and loves looking at amazing photographs that captures the 'moment'. Looking forward to explore in the world of lights and shadows and learn more skills on taking the 'wow amaazing!' photo :)

Tuesday, 5 October 2010

Project 3 Object: 5th photoshoot_edited photos

PROJECT 3_OBJECTS_FINAL IMAGES


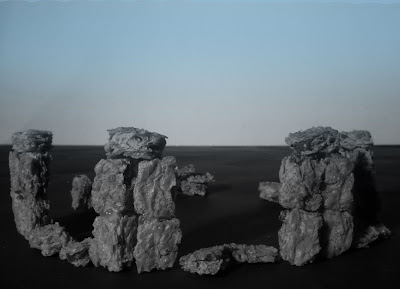
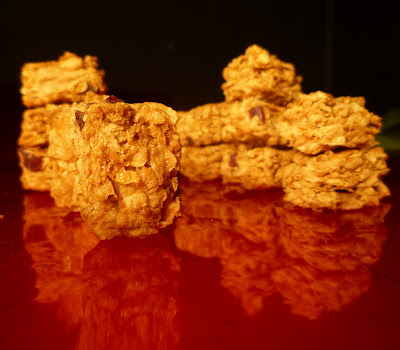
Object: Fuitybix bites


Object: Sugarcubes


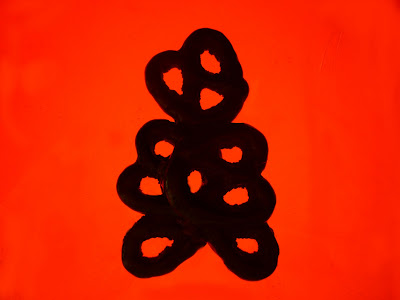
Object: chocolate pretzels


Overall I think this project has helped me to explore more into lighting and think outside the square. At the beginning I struggled with what to do with my objects as shown in the ealier posts with the beans. However after talking to tutor, he has inspired me and helped me to be more creative and to try manipulate objects to do what i want.
It was quite good to search on imags that I want to mimic/replicate but created with my objects. I also find that this project I had spent more time and effort into the development process with more photoshoot which gave me more opportunity to perfect an image. The final ideas were derived from the developement process also during photoshoots.
However there are also some areas which I could do better if I had more time.
Lighting, this was the area that I explored the most but still havn't quite mastered it yet. I could have adjusted the lighting a bit more to give the right lighting, and for example in the stonehenge image using better light to mimic the outside natural skylight.
Camera lense, this project I used a bridge camera for the whole project. Because I didn't have a Macro camera and the lense on my SLR camera doesn't produce good close-up images.
All in all, I found this project very enjoyable and fun. It was useful to explore in the different things we could do to manipulate the object to transform it.


Monday, 4 October 2010

Project 3 Object: 5th photoshoot_contact sheets

After looking at the 4th photoshoot, I wanted to used the remaining time to do another photoshoot to get better images for the stonehenge and another image for th sugarbube.

I remember talking to Matt (tutor) from last tutorial that we should show images of our photoshoot setup to demonstrate the different lightings that we are experimenting.
In all of my photoshoots I have experiement with
-spotlight
-floodlight
-light table
-different colour lighting


Contact sheets from 5th photoshoot


Sunday, 3 October 2010

Project 3 Object: 4th photoshoot_edited photos

Here are the edited images from 4th photoshoot, these image I think are quite successful and have the potential to be final images.


For object 1, fruitbix bites there are a few photos which I liked, But still need to decide which 2 images are the strongest to use.

Object 1_image 1_volcano lava: I think this image is good, the red reflection adds to the flaming lava idea.


Object 1_image 2_shadows: This image was interesting as initially it was staged for stonehedge shots, the shadows created by the shapes looks like people's shadows.


Object 1_image 3_stonehedge: I think this image has the strongest idea but the way I have framed and photographed is the best. I should redo this one from a lower angle shot.


For the 2nd object-Sugarcubes, I could not decide which image was better to put in as the final image. It is out of the illuminated wall or the watercube. Even though the they are both good images, I think the watercube image is better to have in the series because it runs with the idea of 'Food Wonders'.


Object 2_Sugarcubes_Illuminated wall on water


.
Object 2_sugarcubes_Watercube


For object 3. Chocolate pretzels, I think the 2 images below are the best from the photoshoots and carries well the idea that I wanted to achieve. In both images it was based on the idea of faces and you could not tell it was chocolate prezels.. right?


Object 3_image 3_Selection


Object 3_Image 2_Tiki

Saturday, 2 October 2010

Project 3 Object: 4th photoshoot_contact sheets

Contact sheets from 4th photoshoot. With ideas in mind, I went and carried out another batch of photos. There were some images that are very successful and would be final image material. The next step that I have to do is to edit through the photos and pick out the best images, remembering that the submission requirement is 2 images of each object.


Thursday, 30 September 2010

Project 3 Object: ideas for final images

After talking with tutor on thursday's tutorial. I have decided to refine the final image with ideas of turning each of the 3 objects into 'world wonders'___Food wonders(?)

1) Turning fruitbix bites into stonehedge and exploding volcanoe with lava
I will manipulate the lighting and colours to achieve these images

2) Turning sugar cubes into glaciers and the watercube (beijing olympic)
I think that when the sugar cubes are illuminated by lights from the inside, the effect is really appealing.

3) Turning chocolate pretzels into a tiki character and a mysterious/scary face(mask)

I will do the another batch of photos in the weekend to produce these images before the final handin on tuesday 13th Oct.

Wednesday, 29 September 2010

Project 3 Object: 3rd photoshoot_part 2

Edited photos of the 3rd photoshoot:

Fruitbix-scape
Here I used the fruitbix bites to stack up to create a cityscape.
1)The lighting at the back was created by a phone touch.. That creates the city streets with car lights at the back.
2)


3) This image I wanted to create the horror feel to it with the red lighting and the reflection made this image interesting. Almost like rock mountains reflection on a red river.


4) Fruitbix-cave- the white balance was a bit off in this image, but it still portrayed the idea of the fruitbix pieces creating a cave, the flaky texture of the fruitbix imitates the cave like rock textures.


Revenge of the Pretzel :)
This two image was taken on a light table with the red sheet on top, and no other external lighting. This created the mysterious shape with no define texture, which added the element of mysterious-ness.

1) Pretzels that looks like a face


2) Odd one out.


The following two images are taken with a spotlight. Here I am trying to create the feeling that the pretzels are like aerobics figure standing up.


I could improve this image by using lighting to cast shadows that makes them look like they are standing up/staggering up like aerobics in a circus.
I think the fruitbix-scape was quite successful and I could continuing exploring that object.
The pretzel was good too, but I have to decided what I want to create with it.
The most important thing is I need to decide what is the overall theme with 3 objects, do they need to have a narrative that relate to one another? Or do I want each of them to represent different things but at the end is about the same topic, like revenge of the FOOD. I will need to think hard about this and decided within the next few days.
Also, I still need to carry out my experiement that I wanted to do transforming the heads of match sticks into raspberries.

Tuesday, 28 September 2010

Project 3 Object: 3rd photoshoot_part 1

With the previous 2 photoshoots, I'm still a bit unsure as to what I want to photography. But this time I had better ideas in how I'd photography my objects and a compact camera that will give me better results.

The objects I had with me was all FOOD. I decided it was suitable to use food because they are readily accessible that I could get hold of anytime, and there are so many varietys and shapes that I could chose from.


Today I went into the studio with
-fruitybix bits, which shaped like bricks

-Chocolate pretzels


I also experiement with different colour lighting, which was quite funny to play with and it completely transforms the mood of the image.

CONTACT SHEETS


Project 3 Object: 2nd photoshoot

Second photoshoot I wanted to experiement with matches to see if I could create something cool. I set up a mini studio at home and I had burrowed my friend's bridge camera, so I wanted to try and get familiar with the camera.


Here are the images that I think was good:

The composition of this image reminds me of a waterway or riverside. I could improve this image by adjusting the lighting, but because this was done at home it wasn't possible. Also adjusting the focus and the angles, maybe even go closer.


I like this image because from looking at it at a glance, you don't really know that it's matches, kind looks like a bunch of flowers.


This got me thinking. I could manipulate the matches to look like raspberrys! To transform it from it's original function- part of the brief.


Next step:

I wanted to keep the options open, and experiment with more objects. As well as go to the photogrpahy room to use the different lighting on the objects.

Project 3 Object: Edited photos from initial shoot

Here are the edited photos from initial photo shoot. I experiemented with the beans and trying to liquify them by doing the pouring action. After this photoshoot, I was not very satisfied with the results, I am thinking of choosing more interesting objects to create more interesting and creative images.

Also this photoshoot was taken with my Canon 50D, with 18-135mm lens which was not very useful in taking close up photos. I will experiement further with a normal/compact camera to achieve the close up more focused result.


Pouring. Liquidfying the beans.


Dancing beans :)


Standing out.

Monday, 27 September 2010

Saturday, 25 September 2010

Project 3 Object: Inspiration Ideas + decision on objects

I have researched on the internet on creative photography and Macro mystery themed photography. Here are the images that I found successful and I could learn from them.


Sticky notes - Repetitive patterning to create an image.


Holes in a grater - Closes up on an image so it appears differently than in it's typical form.


Onion - Extreme close ups to make an image appear different from it's form, some beautiful textures and images could derive from that. Like this onion, appears to be a very beautiful form kind of like a dress or something nice and graceful like that.


In side of a hard drive - Almost like a city scape inside that plastic cover. I'd alway wondered whta the inside of the incredible machine looks like.


Eye? - This was a very cool but scary photo at the same time of an eye. When I first looked at this image I though it was a key hole.


Human eye - I find this image quite nice, the focus is on the eye and the clock face on it.
The 10 objects that I want to explore:
1. Scarf
2. Match sticks
3. Pins with coloured heads
4. Grapes/ fruits
5. Beans
6. Glasses
7. Pearl necklace
8. fruitbix bites
9. sugar cubes
10. Chocolate pretzels
Next step will be to pick a few of the above item and begin shooting!